On this page I will be listing some of the hardware and software resources that I use for my trading, so that my students and other traders can take ideas from it while setting up their own trading workstation.
It is worth pointing out that these resources can also be used by people who work from home.
Before I go ahead and start with the technicalities, below is a view of my second office.
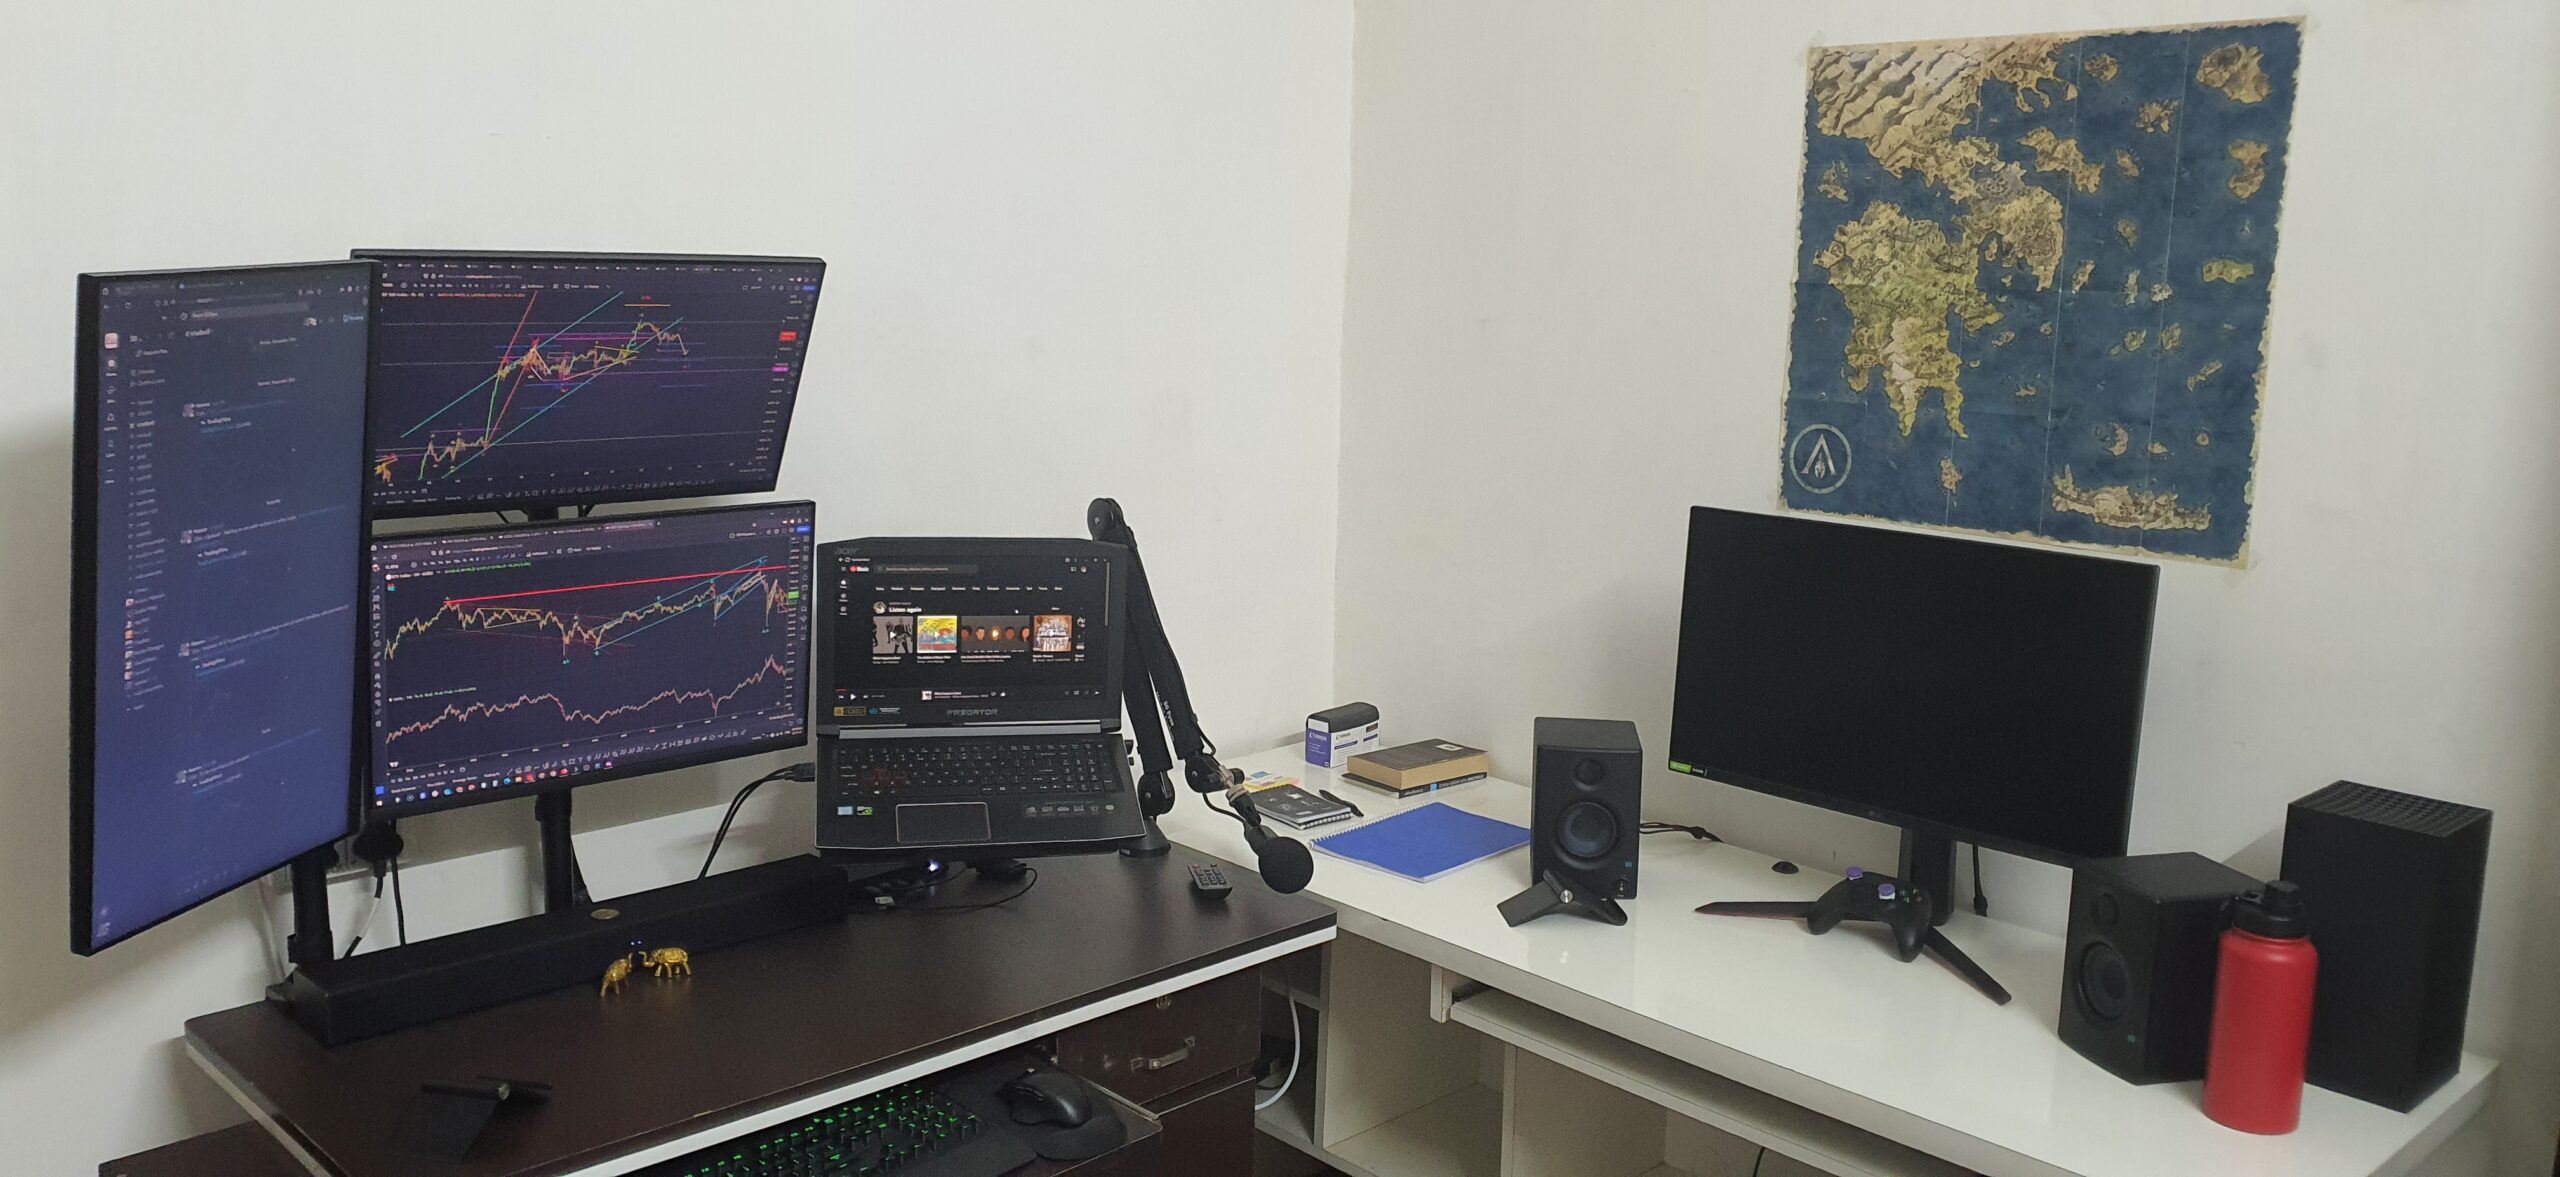
Trading Setup
Starting from left to right you see a 27inch monitor(Vertically aligned), two 24 inch monitors stacked on top of one another, the laptop powering the whole setup and a 27inch display on the right side on the white table, more on them in the article below.
Monitors
As a trader having a multi monitor setup is always good, however as long as you can have one big display to put your charts on and a secondary display (Laptop screen) for executing your trades, it is more than enough.
The two stacked monitors are 24 inch and the one Vertically aligned on the left and the one place on the right (White table) are 27 inch monitors.
But if you are going to buy just one monitor to attach with your laptop’s HDMI out or Display Port then a 27 inch monitor is recommended.
Specifications you should look out for are as below :
- 1080p display is quite alright for trading.
- Minimal bezel design (sometimes called bezel less display) with no company logo in order to keep things distraction free.
- Refresh rate : 60 Hz or higher, refresh rate basically is the number of times the display is able to draw a new image.
- Response Time : 8ms or lower, at the time of writing this article I’m using a monitor with 8ms response time which is working fine but the lower response time you can get the better. Response Time basically means the time taken to shift from one colour to another.
- For a multi monitor setup I use 24 inch monitors, if you are going to just connect one monitor to your laptop then it is recommended that you go with a 27 inch monitor.
- A monitor which comes with a USB hub inbuilt will be an added benefit, like the Dell P2422H or Dell P2722H which is what I’m using at the time of writing this article.
- Vesa Mountable : If you want to stack up multiple monitors, or you simply want to put your monitor on a stand so as to keep more free desk space then you should look for a monitor which is Vesa Mountable.
Monitors I’m using as of now :
For those who are not interested in researching and simply are looking for what I use as of now, they can go with Dell P2422H (24inch monitor) or Dell P2722H (27inch monitor).
I will now elaborate a bit more on some of the points that I have mentioned above :
- Bezel : The area around the actual display is called bezel, many companies also like to put their name or logo at the bottom of the bezel as you can see in the image below.
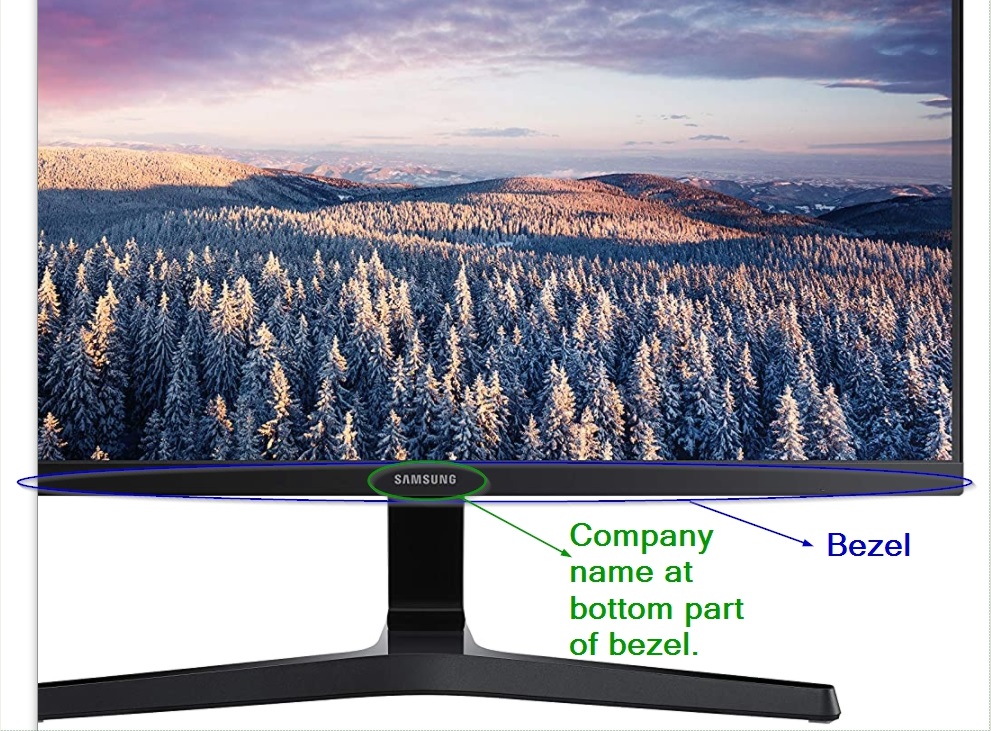
Monitor with Bezel and company name
In case you want completely distraction free environment you need to look for a monitor with minimal Bezels and no company logo on it, something like below.
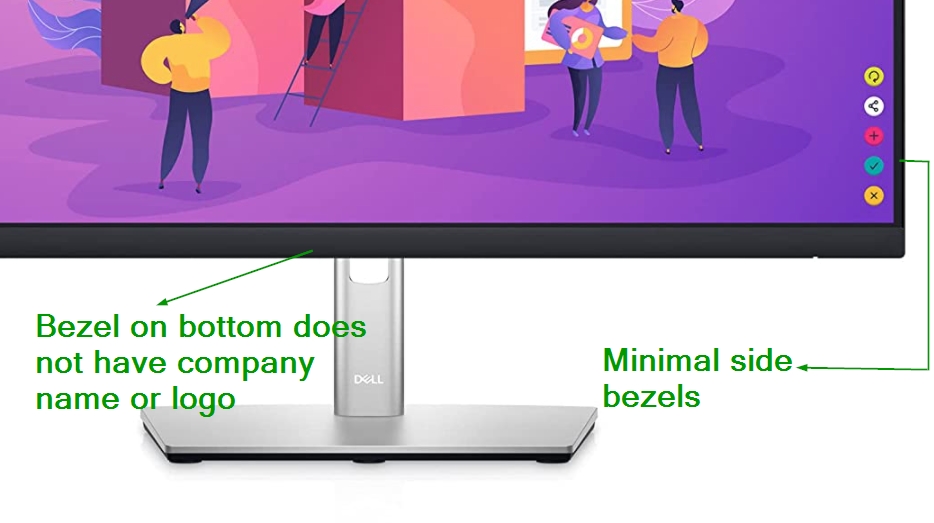
Dell P2422H with text illustration
- USB Hub : No matter what kind of setup you use, having a Keyboard, Mouse, Webcam, Sound system and other accessories means you will need USB ports and multiple of them. You can go ahead and buy an external USB hub, at the time of writing this article I’m using a Dell D3100 USB 3.0 HUB which allows me to connect multiple monitors using only one laptop, but if you are going to connect only one external monitor you can look for other options which will cost much less. The above mentioned Dell Hub has 2 HDMI ports and One Display port at the back, so let me explain the use case. Once you connect the USB hub to your laptop or computer you can then attach your External monitors HDMI cable in the back of Dell USB hub, since it has two HDMI ports, hence you can attach two monitors using the HDMI cables and if you want to add one more display use the HDMI to Display port cable or get a monitor with Display port available in it. Hence you can effectively use three external displays and also use your laptop screen at the same time, but keep in mind you need to have a powerfull enough laptop or computer for it, something with i7 processor and atleast NVIDIA 1050ti or higher level graphics card is preferred. Below is the image of the HUB with it’s multiple connection options.

Dell D3100 USB Hub Front Side
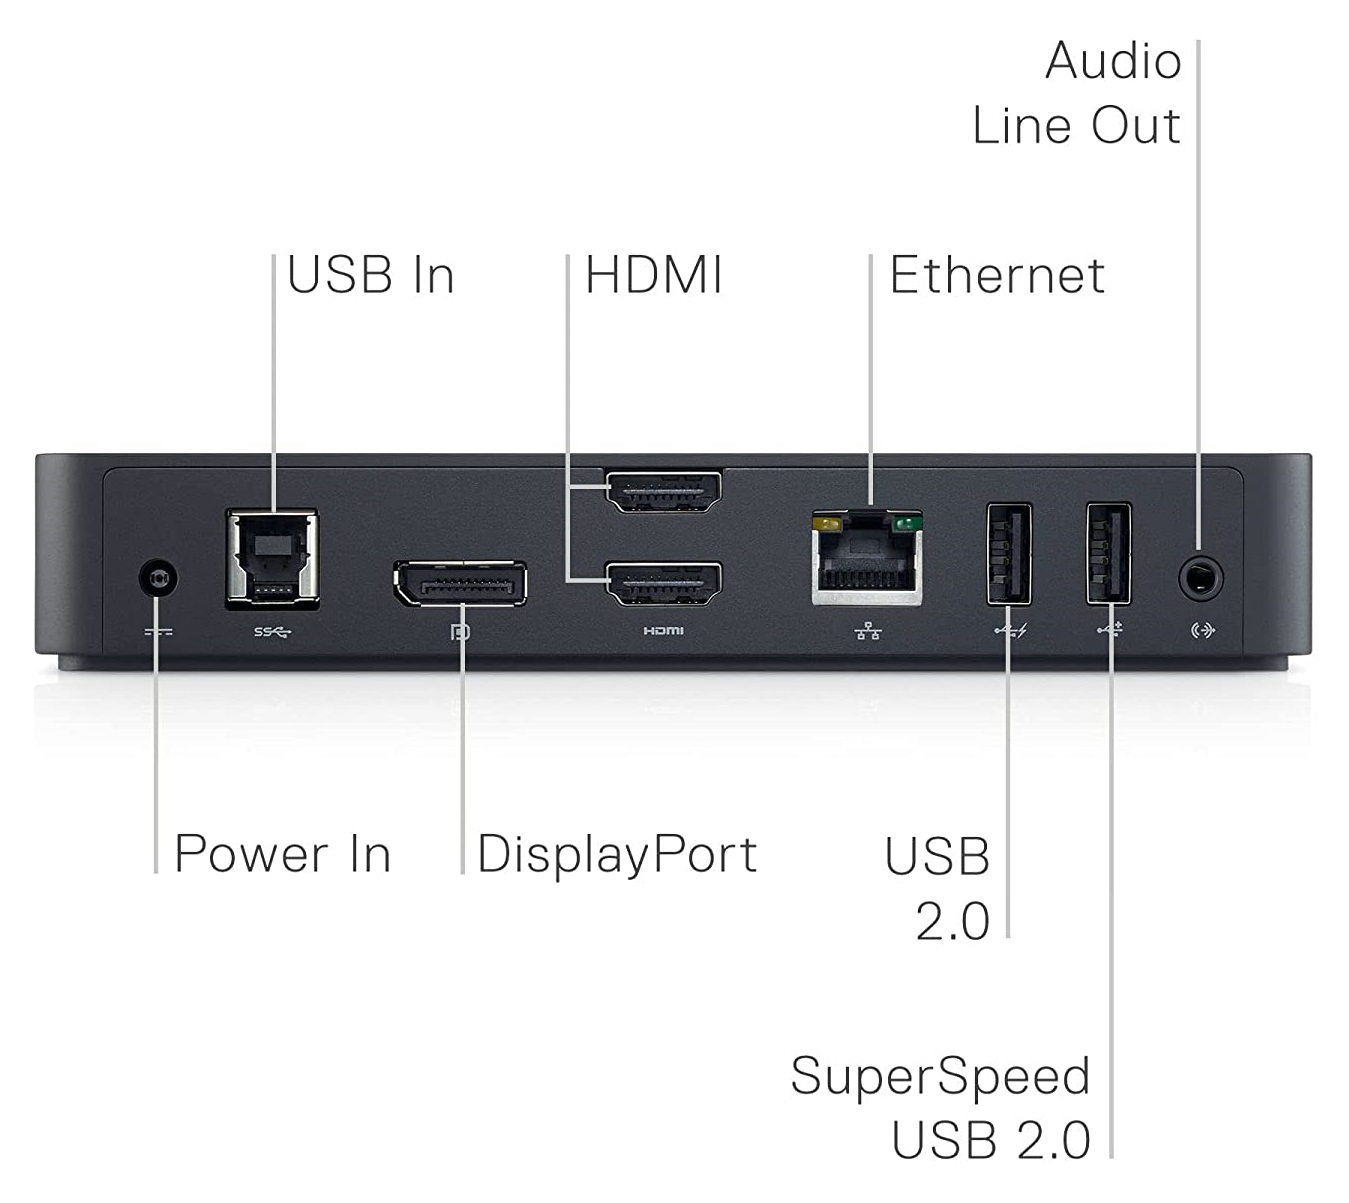
Dell D3100 USB Hub Back side
So as you can see you get a total of 5 USB ports, 3 USB type 3.0 and 2 USB type 2.0, you can also connect your ethernet cable to the hub and your sound system if it has an AUX input mode, plus the 3.5mm jack on front allows you to connect a headset having microphone capabilities.
Now that we have talked about the option to use an external USB hub, let’s talk about in build options, by inbuilt I mean a USB hub built inside the external monitor, so technically it is still external but saves you from going and buying a separate hub, depending on your needs ofcourse. If you have read the article from the beginning you might recall that I have suggested Dell P2422H and Dell P2722H, both these monitors come with a USB hub build inside them. What that really means is that these monitors have multiple USB ports built on the backside, once you connect the monitor via one USB cable to your laptop or computer, you can then start connecting your USB peripheral devices to the monitor directly. Below you can see the backside of Dell P2422H with various USB ports.
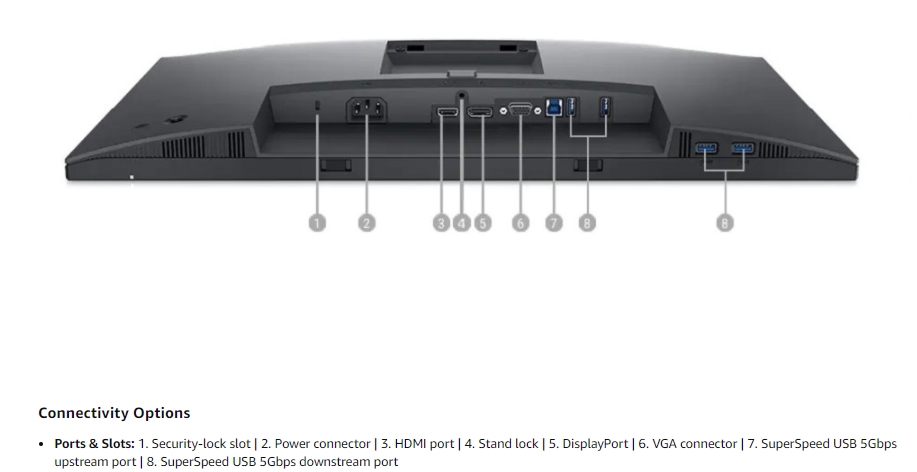
Dell P24 22H with multiple connection options
- Monitor Desk Mount : If you have purchased a monitor which has Vesa mount then you can buy a desk mount and free up table space. I prefer the Vertical mounting option instead of the Horizontal mounting option if possible; as having the displays stacked up vertically means that I do not have to turn left and right and hence allows me a better position for neck. Just use the search term “Vertical Monitor Mount” on your preferred shopping site. I prefer the clampable option rather then the one which sits on top of the desk as clamping allows greater safety. Below you can see the difference between a clamp and freestanding option.
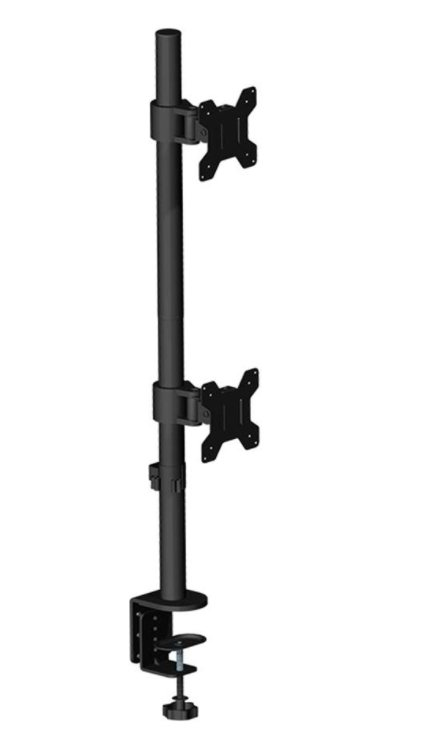
Recommended : Clampable Desktop Mount
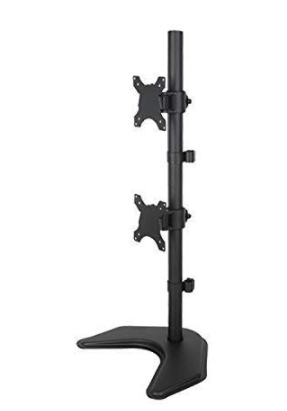
Freestanding Desktop Mount
Before going ahead and buying a clampable monitor mount, do make sure that your desk has space to hold it.
Thing to avoid :
- Get a mouse and avoid using touchpad, it will make your workflow faster and much precise.
- Use a software such as f.flux (https://justgetflux.com/) or Iris (https://iristech.co) that will put a blue screen filter on your screens. Windows also has an inbuild option for doing the same, but if you want more customizability you can try the mentioned software’s, it is worth pointing out that f.flux is free and available for Windows, Mac and Linux users and Iris has a free trial version but is available for a small one time fee. It is also available on Windows, Mac and Linux.
- Make sure you are maintaining a proper seating posture and invest in a gaming chair if you feel the need for it.
From Setup to Real Market Execution
A trading setup is only effective when supported by a structured approach to market analysis and execution.
To understand how market forecasts translate into real outcomes:
👉 Explore detailed trading case studies
For current market outlook and ongoing forecasts: